Last updated on 2023-02-10, by
What to Do When Twitch not Saving Streams?
For gamers and streamers, Twitch is the best platform to stream gameplay and meet like-minded people. You can also save your streams after broadcasting for future playback. However, sometimes your streams are not archived in VOD. So why is Twitch not saving streams? What to do when Twitch is not saving streams? Just keep reading to find all the causes for the issue and proper fixes.
Outline
Part 1: Why are My Streams not Saving on Twitch?
When you find Twitch not saving streams, don’t panic. There are solutions that can help you fix the issue. But before applying the solutions, you might want to troubleshoot the issue carefully. So why are my Twitch streams not saving? Here we’ve concluded all the possible causes. Just check them out.
1.Wrong Settings on VOD
What to do when you find Twitch not saving streams? Your VOD settings should be the first place to check out. It is likely that the “Store past broadcasts” setting is turned off by default. Your Twitch will be saving Twitch streams once the option is enabled. You can save your streams for up to 14 days here.
2.Corrupted Browser Cache
Another possible cause for Twitch not saving streams is that your browser caches are corrupted. Stored on your browser for a long time, these caches like cookies and data have become corrupted, which might block your broadcasts and cause playback issues of all sorts.
3.Past Storage Period
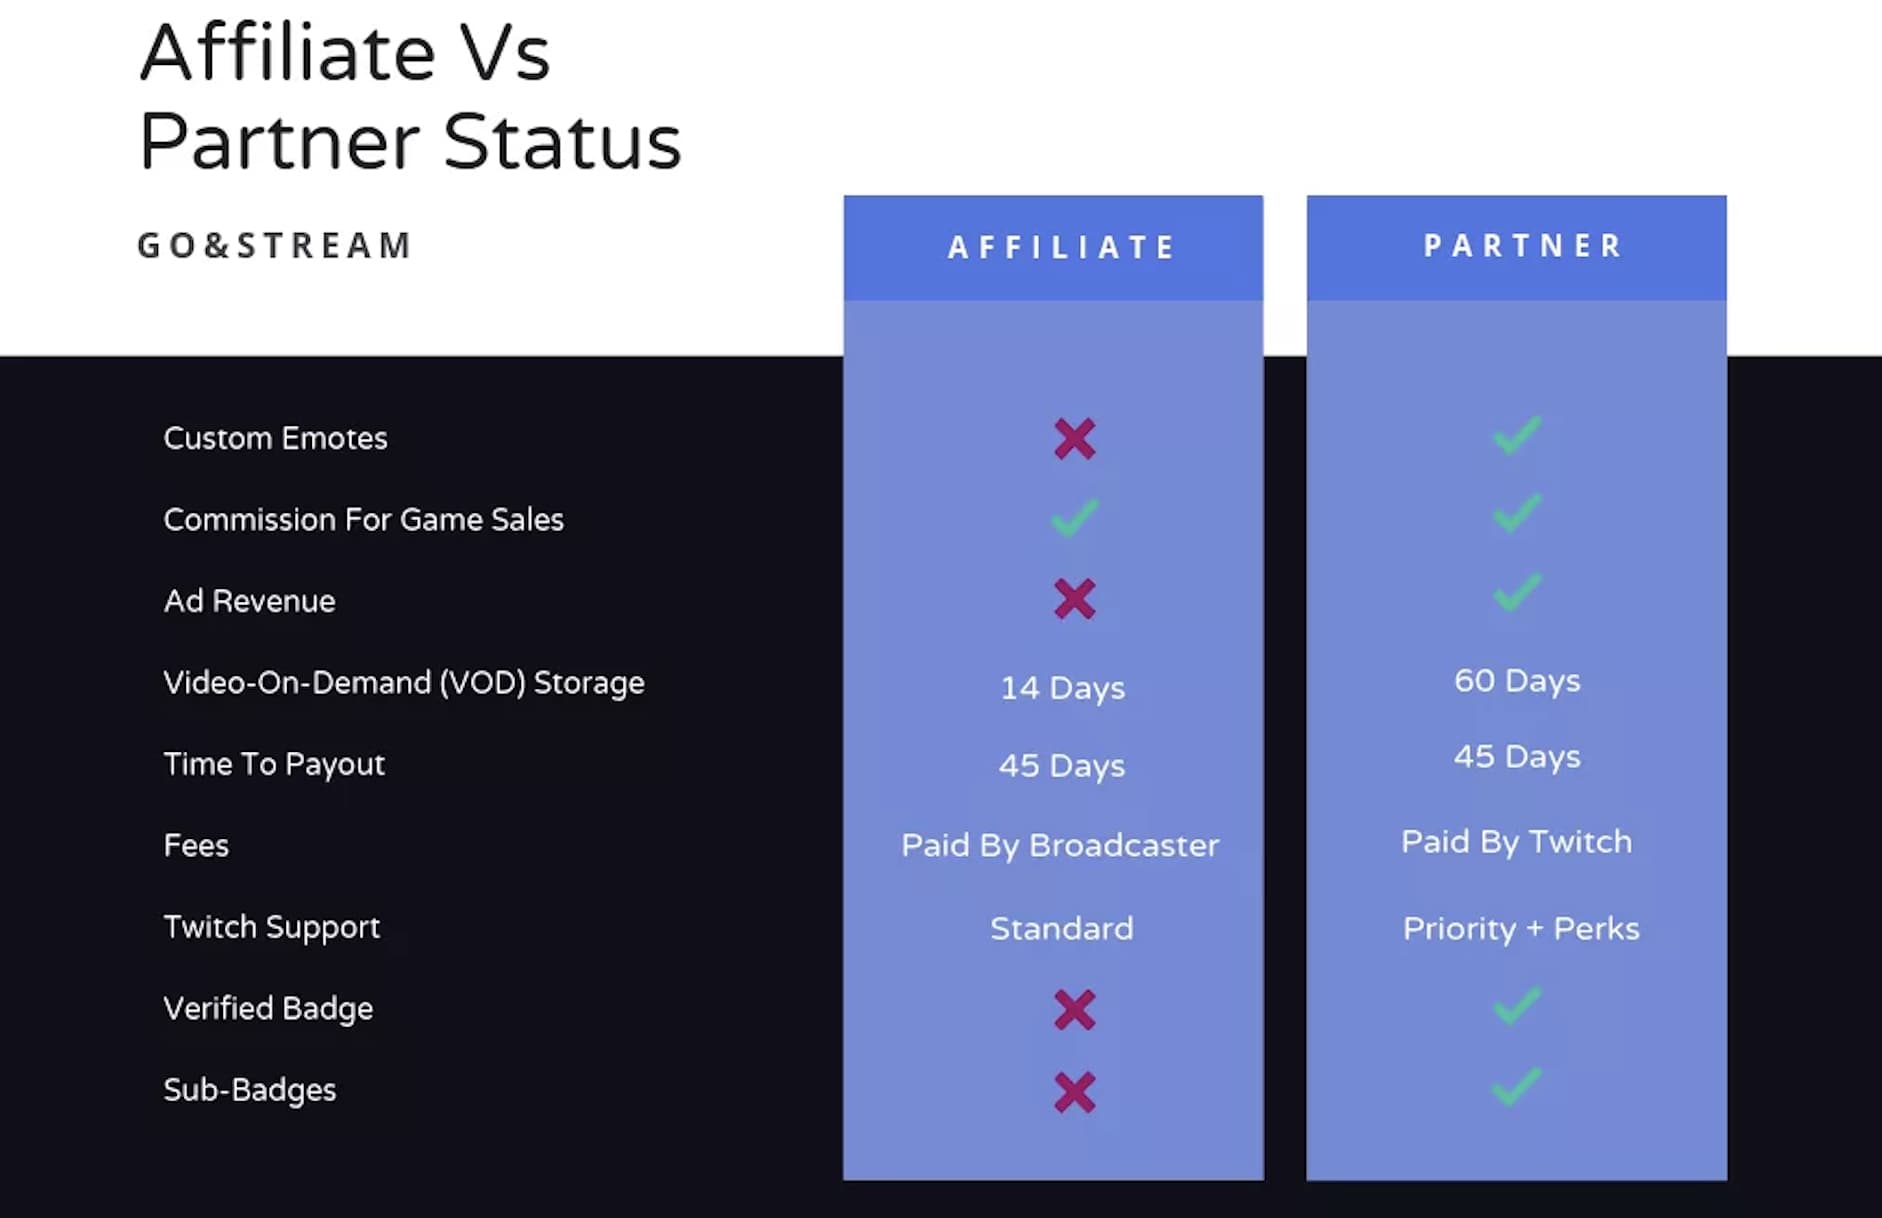
Twitch has a rather limited storage period for VOD, which is 14 days from the date of the release of the videos. The time can be extended to 60 days if you have advanced subscriptions. When you find Twitch not saving broadcasts, it can be that the streams are gone already.
4.Improper RTMP Settings
While some people prefer to go live on Twitch with RTMP(Real-Time Messaging Protocol), the third-party encoder might cause the “Twitch not saving streams” issue. This is because the stream key in the configuration by default is not to save your VOD, and you need to adjust it before streaming.
5.Wrong Option to End Broadcasts
Why is Twitch not saving my broadcasts? It can be that you have selected the wrong option to end your streams. There are 3 options when you stop a stream: Publish, Save as Draft, or Delete. You have to select Publish to save your streams to VOD.
6.Lose Connection in Streaming
Your internet connection matters for saving streams on Twitch. Any disconnection perceived by Twitch would start a new VOD. When you experience the “Twitch not saving streams” issue, it can be that your network is not stable enough, which loses connection from time to time during streaming.

7.Twitch Server is Down
When you encounter the “Twitch not saving streams” issue, sometimes the problem is not on you but on Twitch. Because all your streams are saved on the servers, there might be a problem with Twitch’s server when your channel tries to save streams on Twitch to VOD.
Part 2: How to Fix the Issue of “Twitch not Saving Streams”?
With the part above, you should know all the possible causes for the “Twitch not saving streams” issue. So how to fix it? Here we’ve collected useful solutions to help you out. Just have a look at the fixes as follows.
1.Enable VOD Settings
The “Store past broadcasts” in the VOD session should be enabled before you stream. So when you find Twitch not saving streams, go check the settings to see if it is enabled. If not, you can follow the steps below to turn it on.
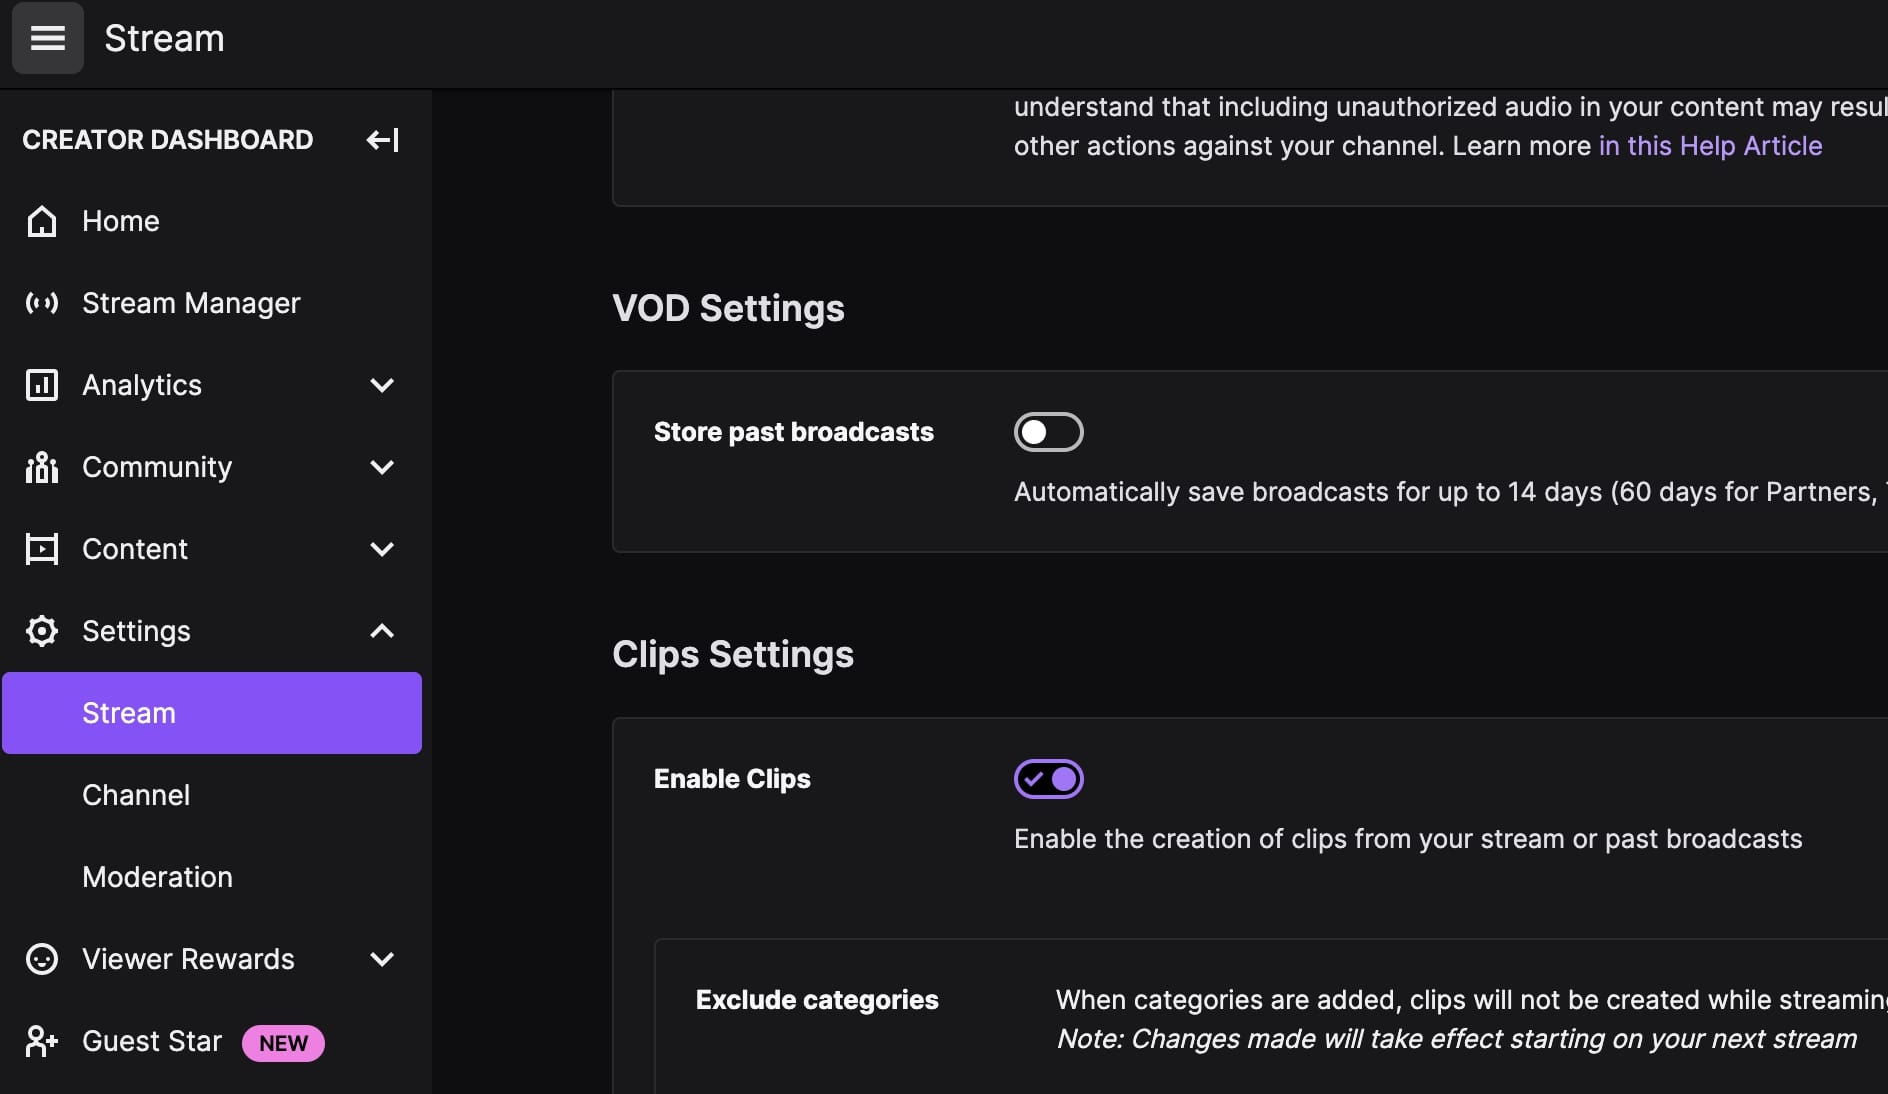
Step 1: Head to Twitch. Click on your profile and select “Creator Dashboard.”
Step 2: Click on the Hamburger icon next to “Home.” Go to Settings > Stream.
Step 3: Toggle the switch for “Store past broadcasts” to the On position.
2.Clear Caches on Browsers
As introduced earlier, your browser cache can be the main culprit for the “Twitch not saving streams” issue. But worry not, you can clear the caches on your browser with simple steps. Here’s how to do it on Chrome and Firefox.
Clear Cache & Data on Chrome
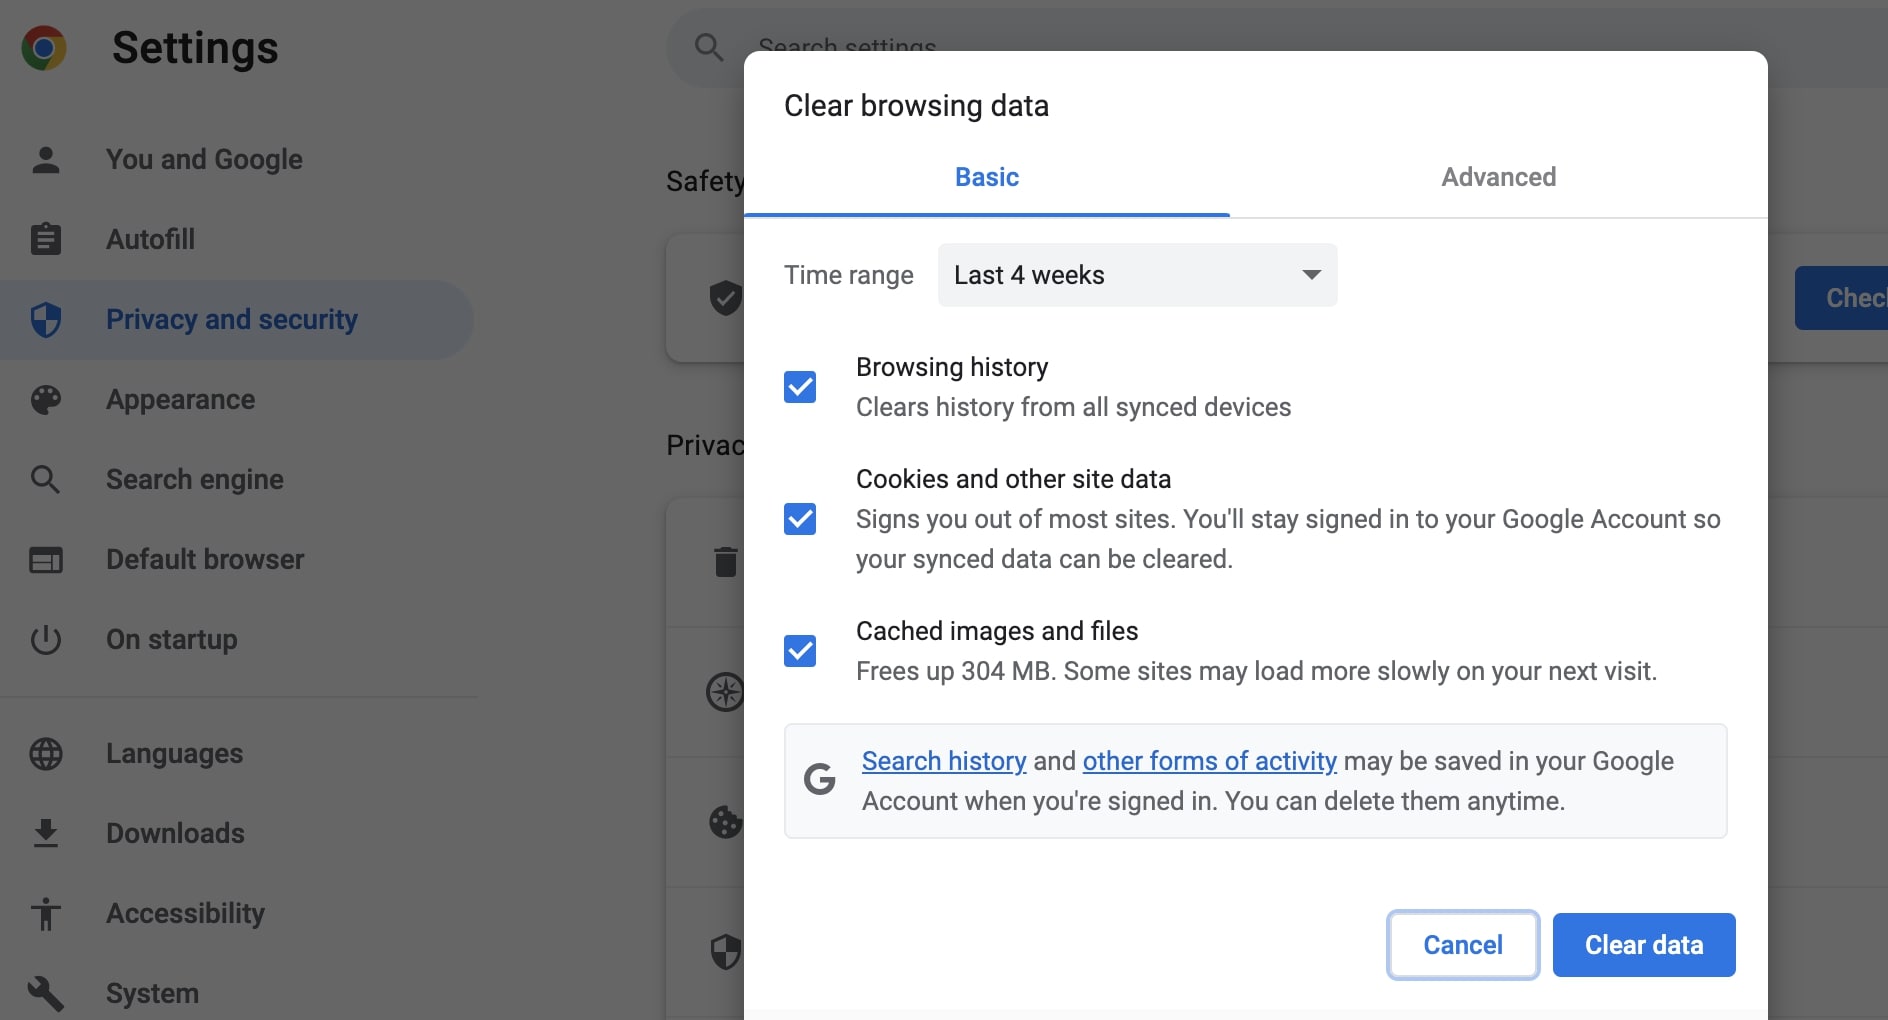
Step 1: Click on the 3-dot menu in the upper right. Select More Tools > Clear Browsing Data.
Step 2: Select the “Time range” based on your preferences and ensure all the options below are selected.
Step 3: Click “Clear Data” to clear the cache on Google.
Clear Cache & Data on Firefox
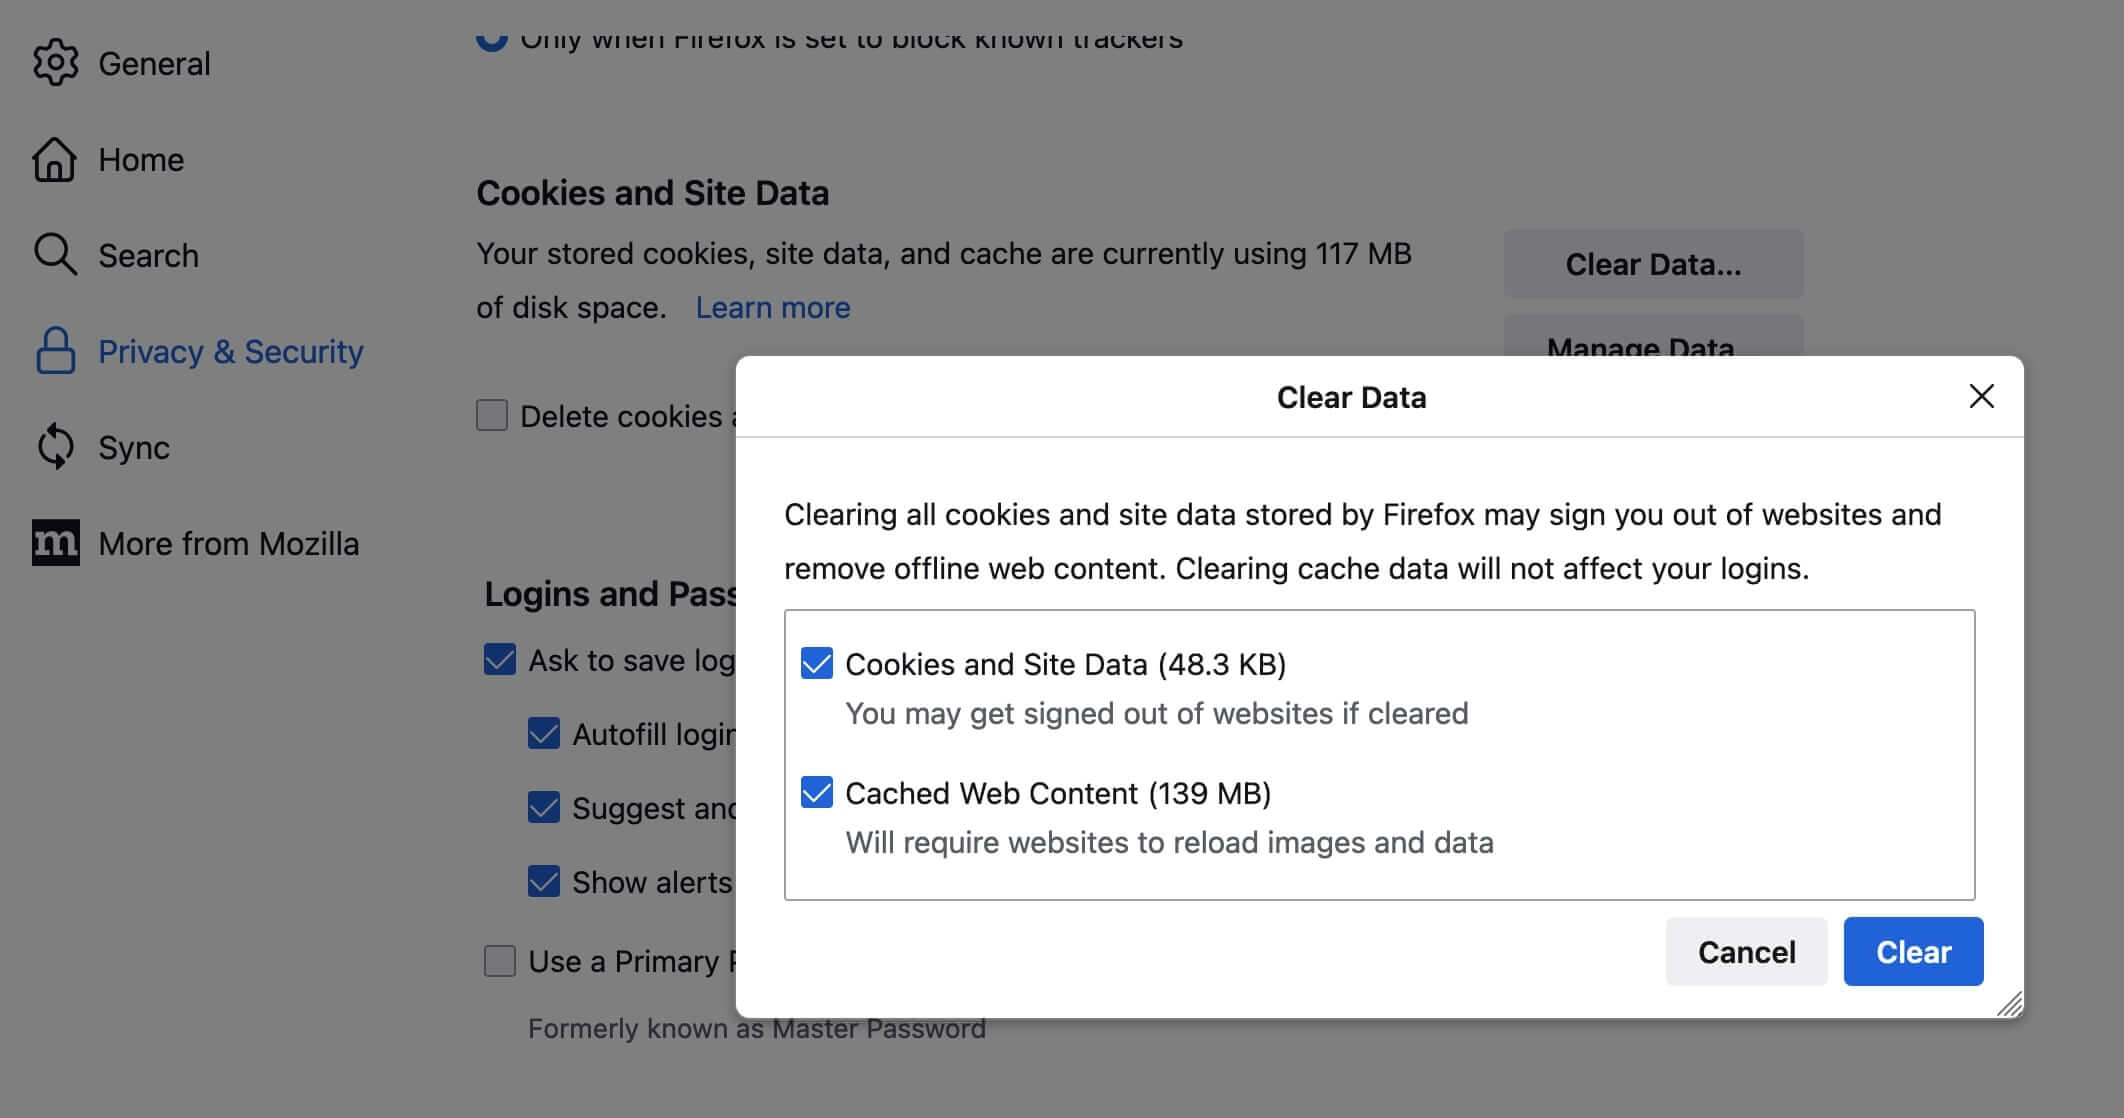
Step 1: Go to Firefox > Preference > Privacy & Security.
Step 2: Look for Cookies and site data > Clear data and tick all the options.
Step 3: Click “Clear” to clear the cache on Firefox.
3.Get Premium Subscriptions
When you find Twitch not saving streams after a limited storage period, it’s better to extend the time range of storage by premium subscriptions. For instance, Prime User and Twitch Partner subscriptions can store past broadcasts for up to 60 days. Just pick one as you see fit.
4.Tweak RTMP Settings
For those who stream with RTMP, you might want to tweak the configuration before streaming. Here’s how to adjust the settings and avoid the “Twitch not saving streams” issue.
Step 1: On the event page, go to Edit Drawer > Live Tools. Scroll down, go to RTMP Input Settings, and click “Get Link.”
Step 2: Switch on the toggle for the “Save ended broadcast as video recording” and tick “Auto-post video to event feed” so your VODs will be published to your event page.
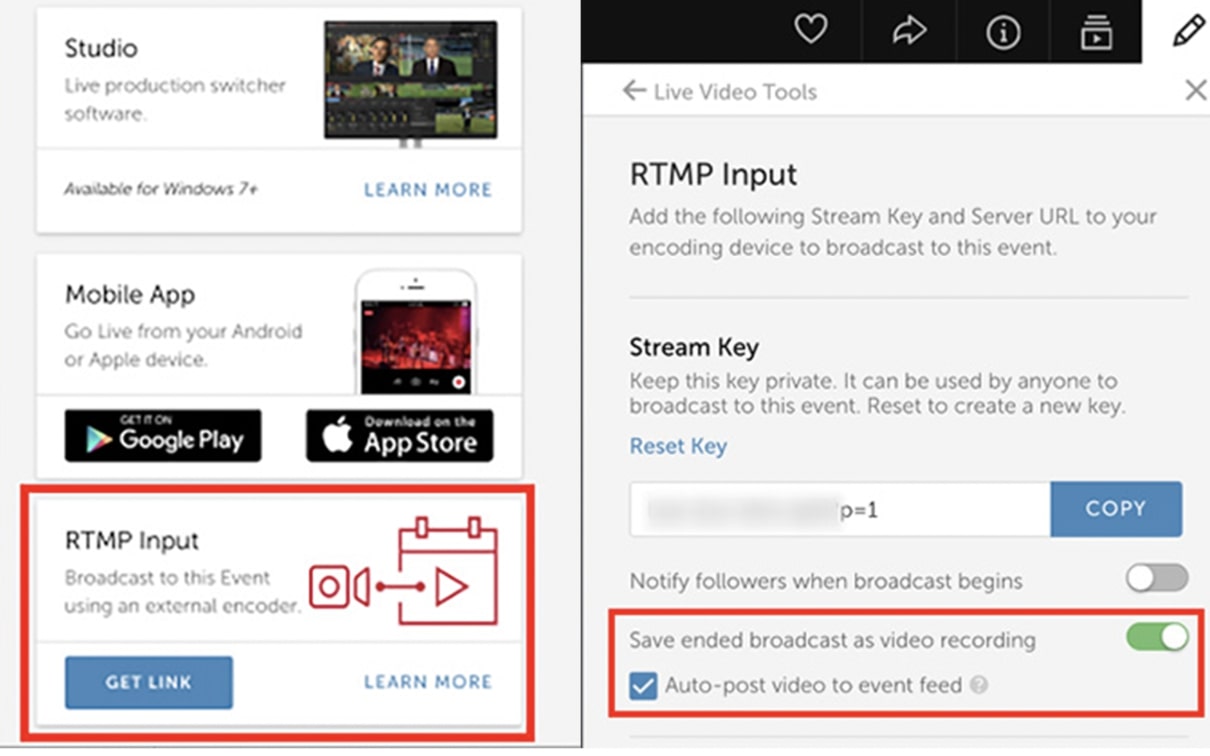
Step 3: But If your VOD still does not appear, you need to check the stream key in your encoder. When the key ends with P=0, your VOD is not saved; when p=2, your stream will be saved as a draft; P=3 means your VOD will be published.
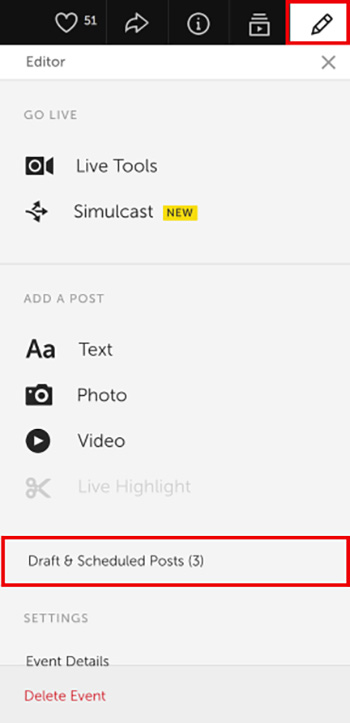
5.End Your Streams Correctly
What to do when you have the “Twitch not saving streams” issue? Only when you select the “Publish” option can you make your VODs visible. Just check out the specific steps to learn more.
Step 1: Go to your event page and click on the Editor icon. Then choose “Draft & Pending Posts” to see all the posts available.
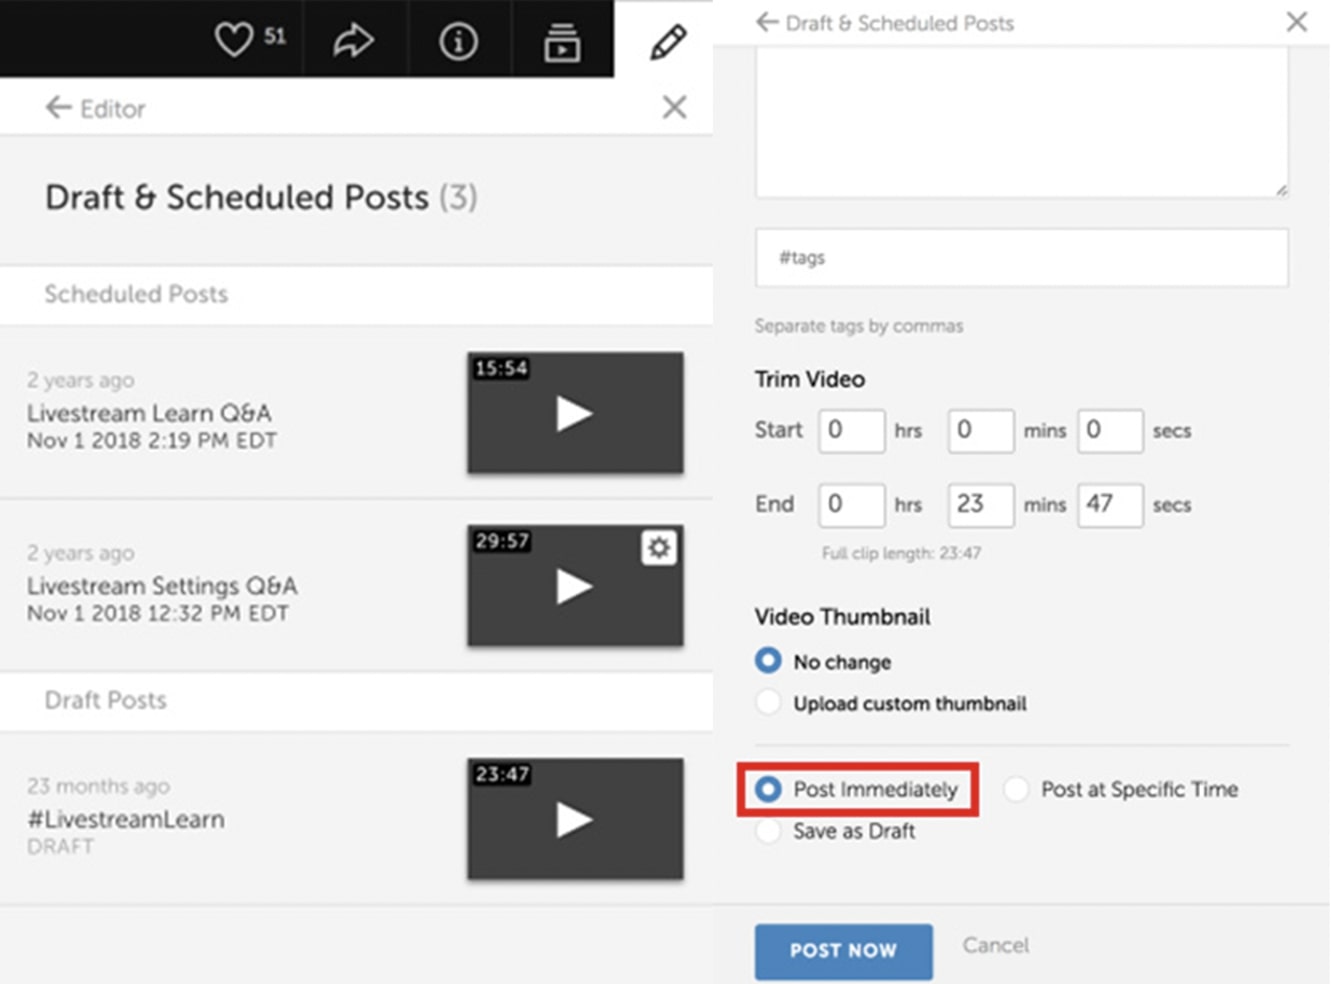
Step 2: Now you can see all your draft posts. Click the post of your past stream to edit it specifically.
Step 3: Scroll down the page and select “Publish Immediately.” Click on the “Post Now” button to publish the stream. Now your VODs should be visible on your channel.
6.Check Internet Connection
You might want to check your network and make sure it’s robust enough to support your streaming on Twitch. Please note that you will need to have a minimum internet speed of 3 to 6 megabits per second (Mbps) for Twitch streaming. So how to identify if your network is qualified? Just run an online internet speed test to find it out.
7.Check Twitch Servers
If the “Twitch not saving streams” issue is caused by Twitch, you can also verify it easily. Just head to Twitch’s status page and you can find out the current status of the platform. If its servers are down, you can just wait for the maintenance and try again later.
Part 3: How to Save Twitch Streams?
With the guide above, now you know how to fix the “Twitch not saving streams” issue properly. So what if you want to download streams from Twitch of your own or other channels? No problem, just use CleverGet Twitch Downloader, the best video downloader that can help you save Twitch streams to MP4 with up to 1080p resolution or even 4K video quality.
CleverGet Twitch Downloader allows you to download Twitch streams in batches with lightning-fast speed. You can download Twitch videos with up to 60fps, which allows you to have smooth and crispy videos even offline. Want to learn more? Here’s how to download Twitch streams with CleverGet Twitch Downloader.
△Step 1. Launch CleverGet Twitch Downloader
CleverGet Twitch Downloader is a module of CleverGet. Download and install CleverGet on your computer.

-
CleverGet Twitch Downloader
- Download Live Videos And Past Broadcasts from Twitch Conveniently
- Download VODs from Twitch Conveniently, be It Highlights or Clips.
- Up to 1080P HD 60fps Video Downloading with 320kbps Audio Quality
- Smarter Downloading Settings
- Provide Precise Video Info

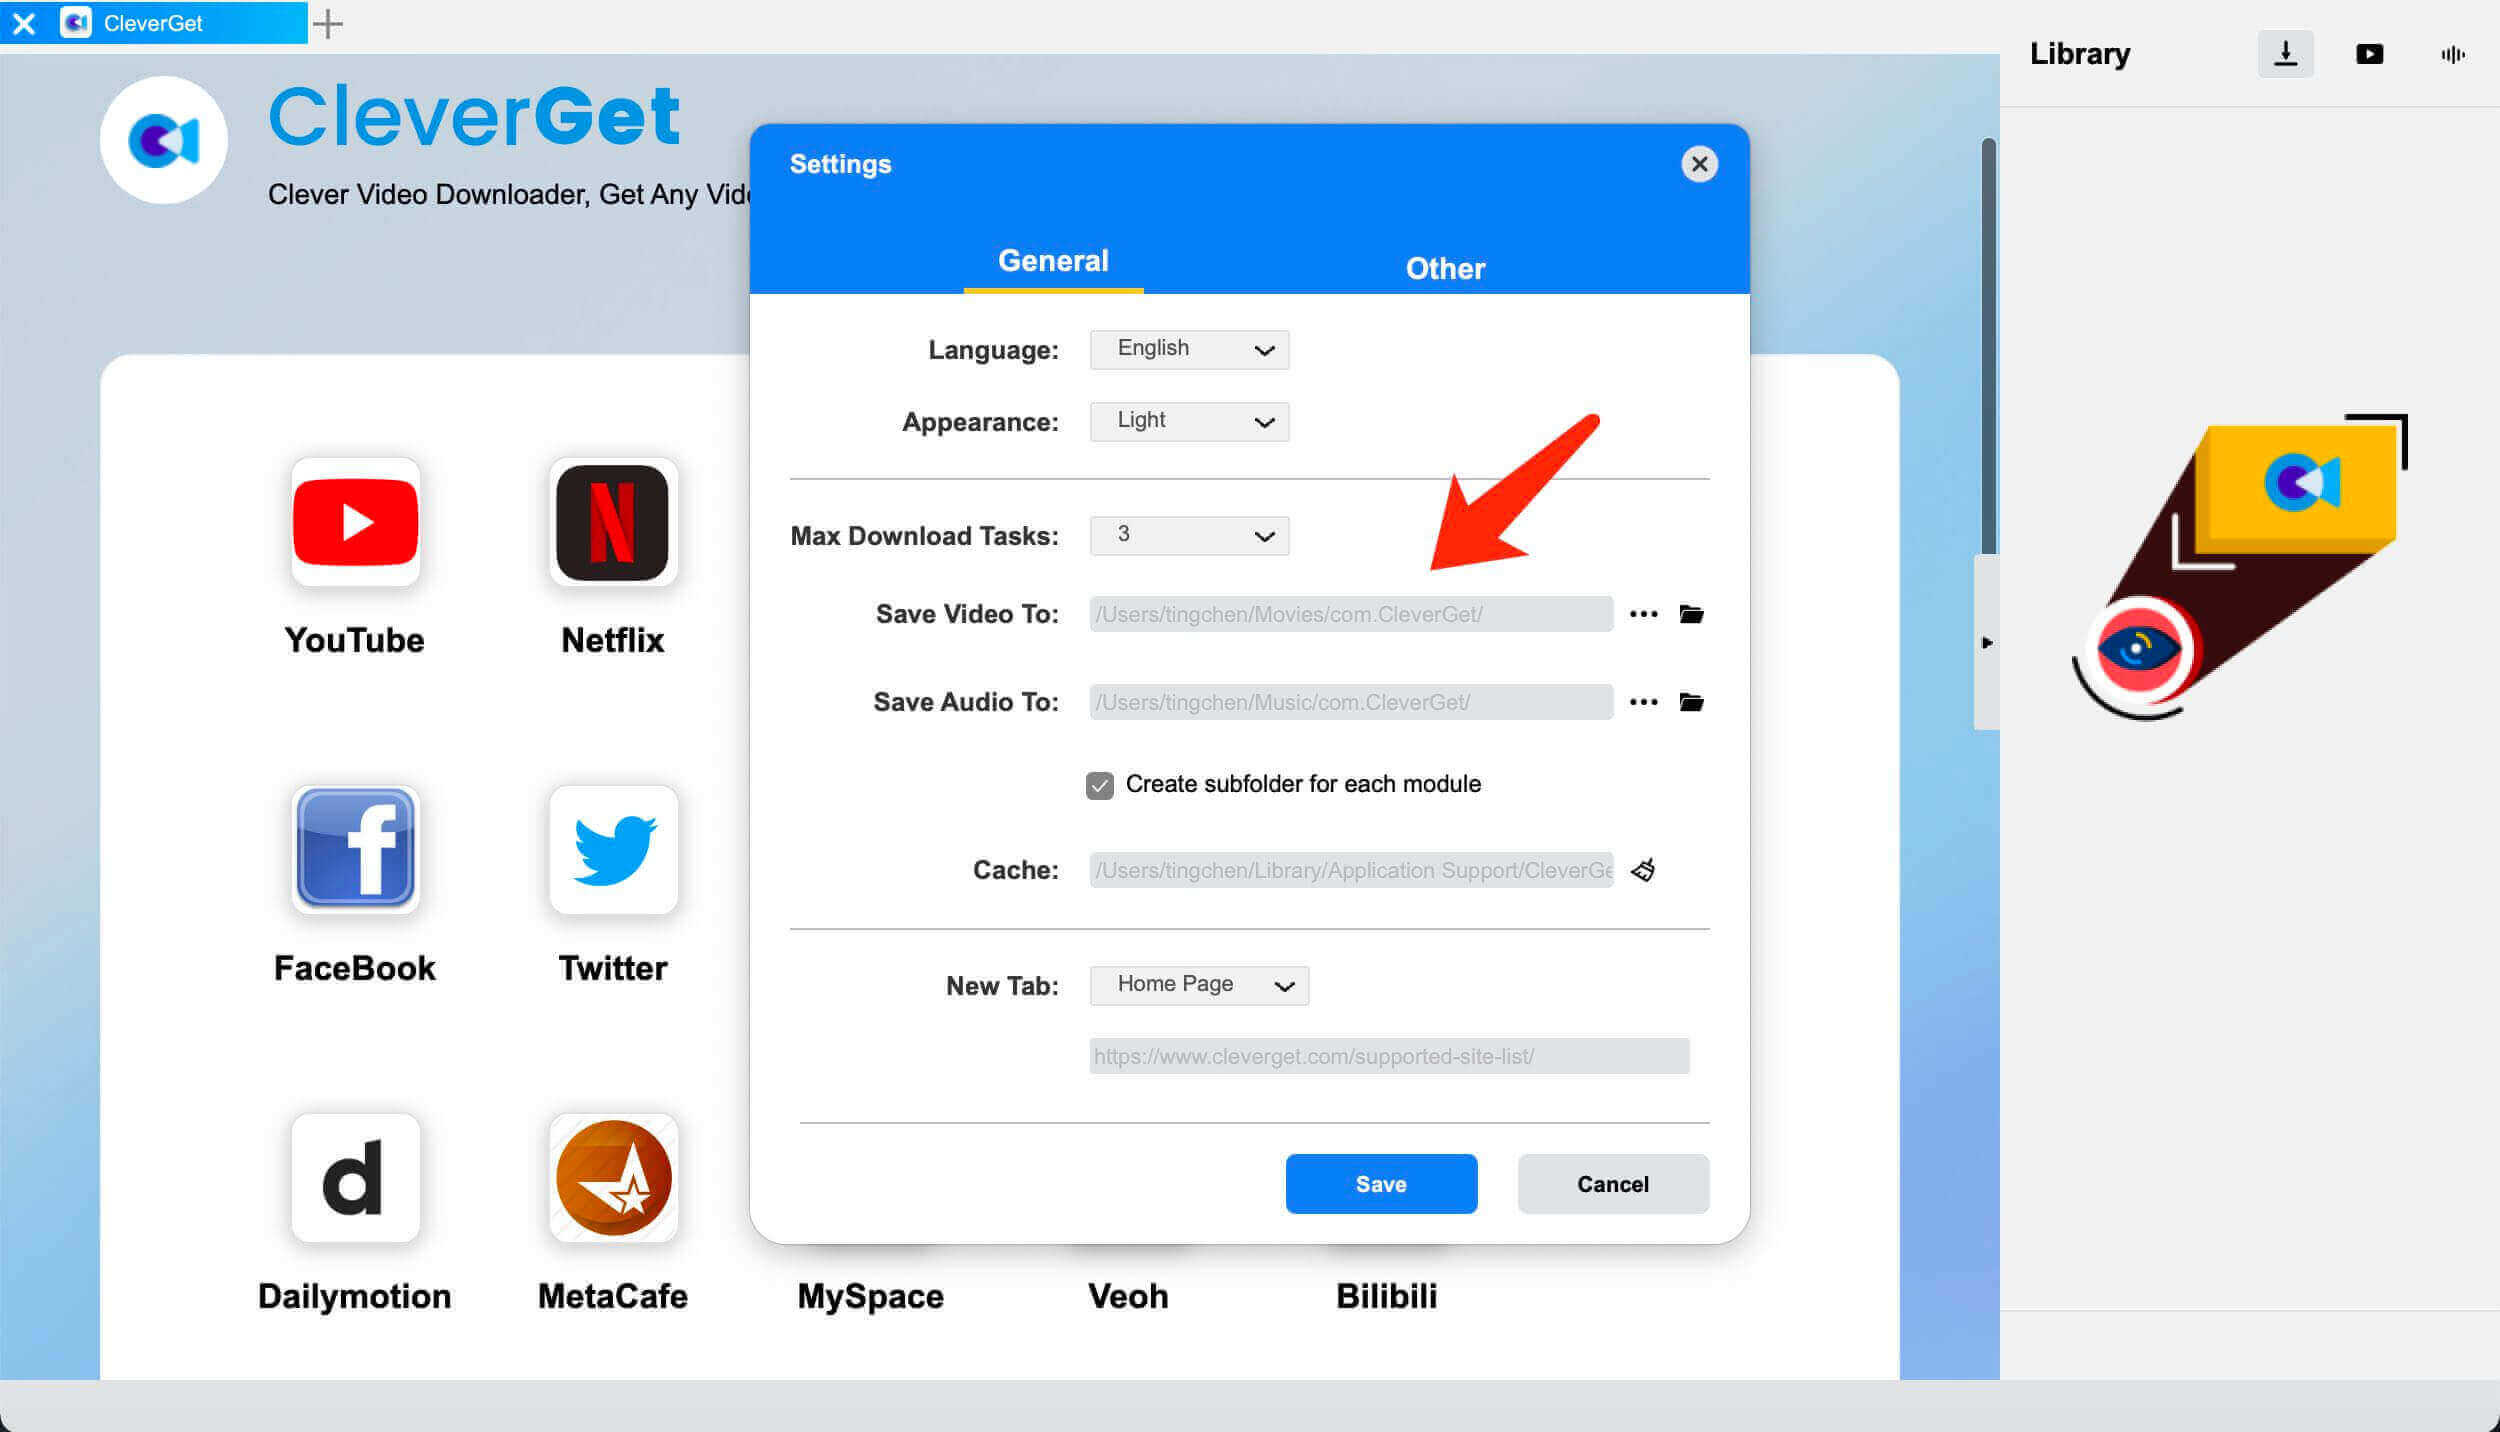
△Step 2. Set Output Directory
Click on the Settings icon to enter the setting panel and set the output directory.
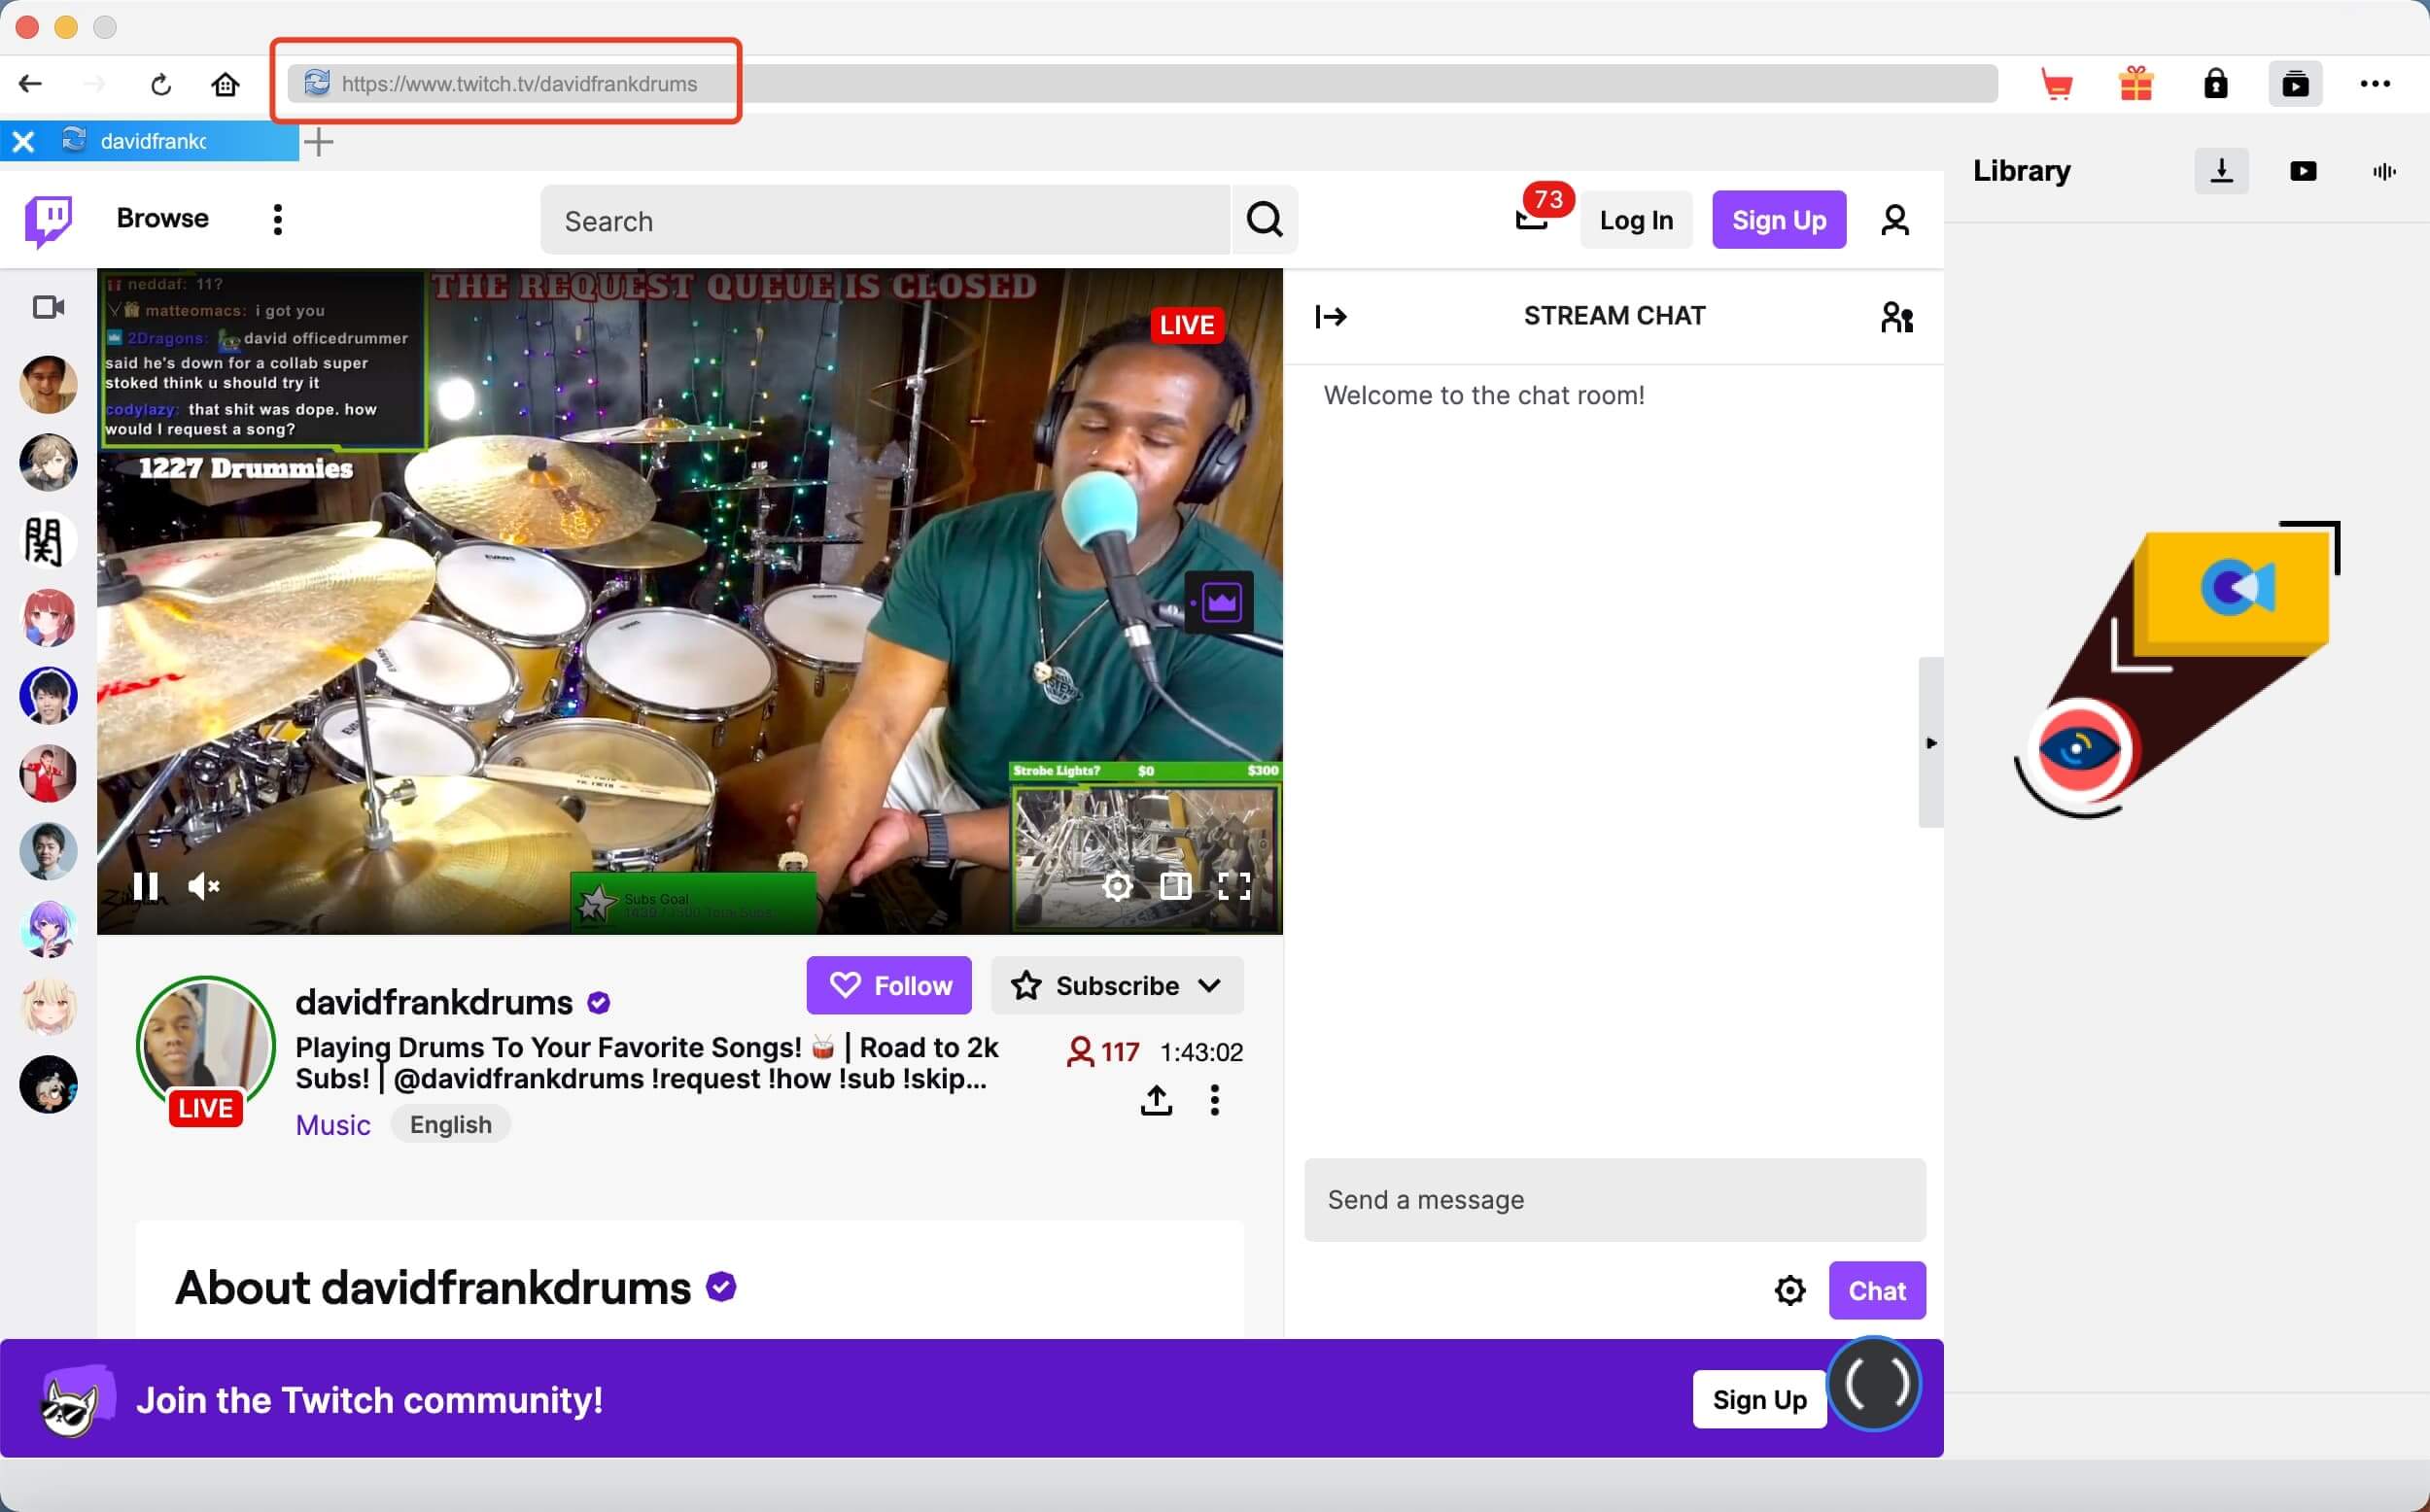
△Step 3. Locate Twitch Streams
Locate the Twitch stream with the built-in browser. You can also paste the link of your own stream to the address bar after you fix the “Twitch not saving streams” issue.
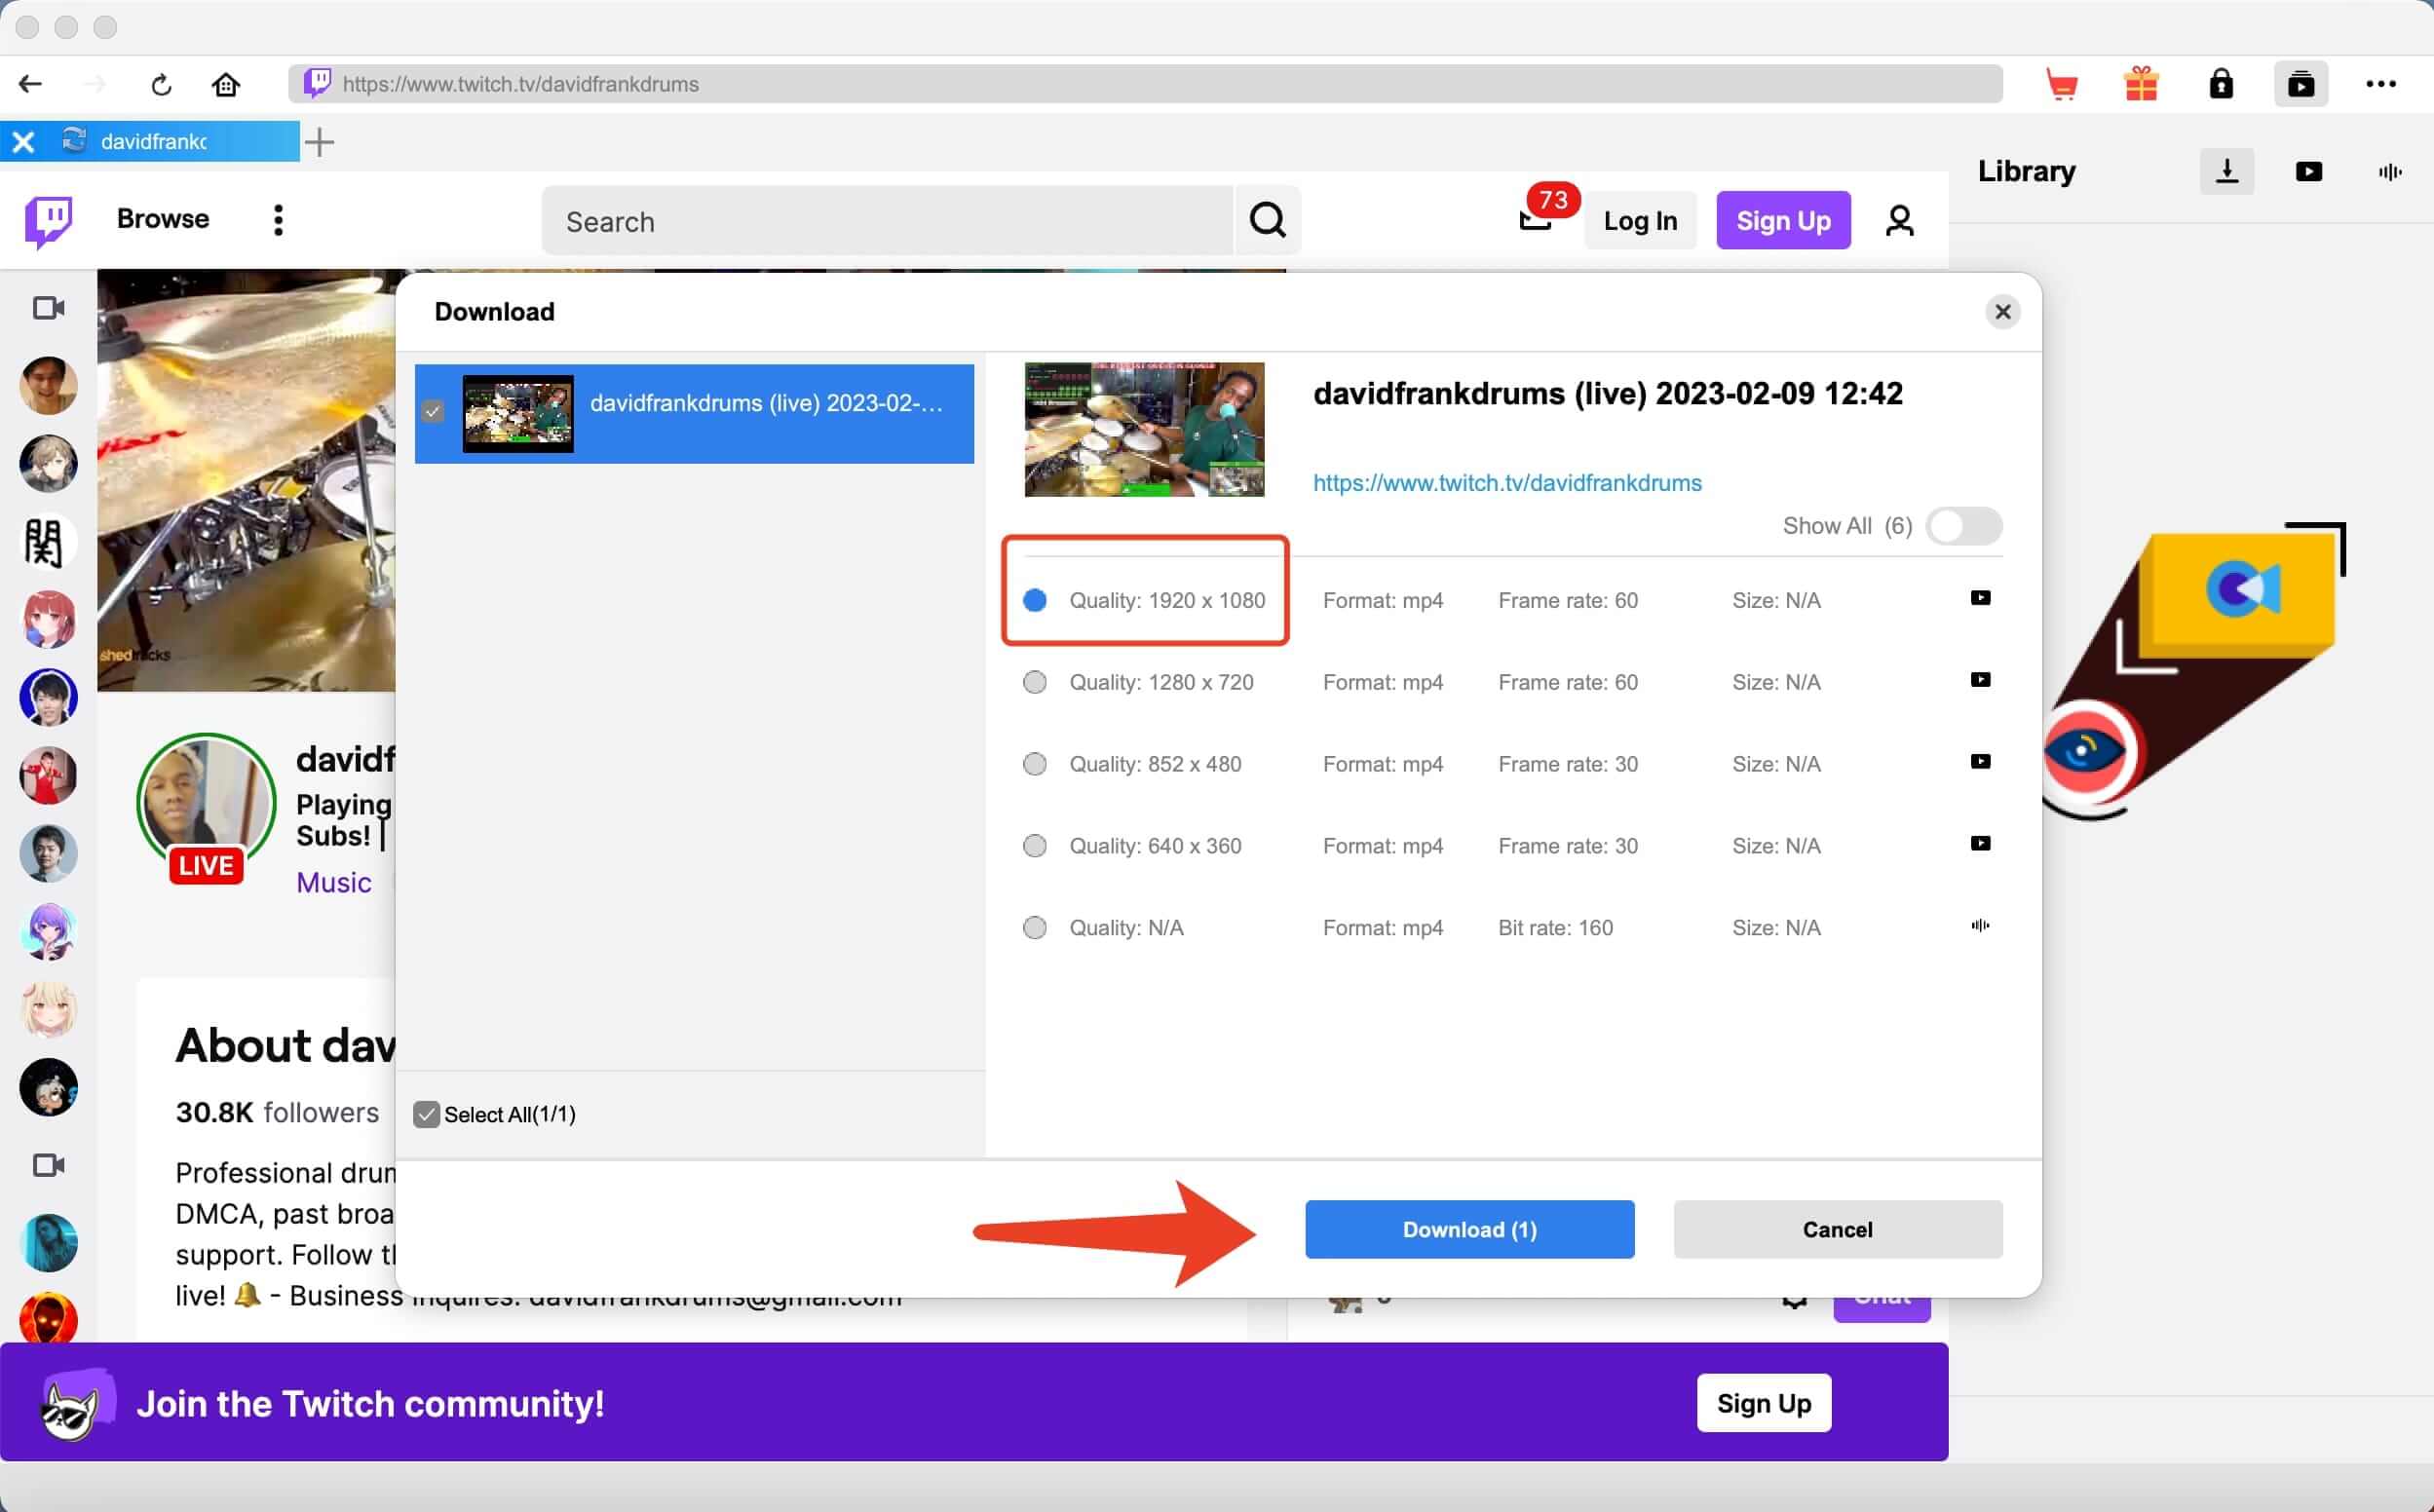
△Step 4. Download Twitch Streams
Choose your preferred quality and format. Click on the “Download” button to download Twitch streams.
You can download 3 videos in total for free with CleverGet Twitch Downloader. If you hope to download more videos with the best video quality, just upgrade CleverGet Twitch Downloader to the registered version.
Notes:
Please mind that you are only allowed to download videos/audio with permission. The videos you downloaded are for personal use only and distributing content offline for financial benefit is not allowed. You can also find the copyright laws in your country/region for more references.
End Note
What to do when you find Twitch not saving streams? Just apply the fixes above and you are good to go. Meanwhile, don’t forget to download Twitch streams with CleverGet Twitch Downloader, so you can save streams of your own or others’ forever!
-
Best Dramanice Alternatives to Watch Korean DramaPatrick/2024-04-19
-
Best Adult Cartoons TV Shows to Enjoy So FarCassie/2024-04-09
-
How to Watch Disney+ Movies on Amazon Fire Tablet?Patrick/2024-04-08
-
Cord-cutting: Best Network Alternatives to Cable TV for You in 2024 [Free& Paid]Cassie/2024-04-03
-
How to Watch TV Without Cable or Internet?Cassie/2024-04-03
-
How to Convert YouTube Clip to MP4 with YouTube Clip to MP4 Converter?Vinho/2024-03-29
-
5 Possible Solutions to Download YouTube ClipsVinho/2024-03-29
-
The Best Action Movies & Most Anticipated Action Movies in 2024Cassie/2024-03-29
-
[Solved] – How to Clip YouTube Videos?Vinho/2024-03-28
-
ESPN App Not Working? How to Fix ESPN Not Working Issues?Cassie/2024-03-28


-
Latest List of the Best Free Movie Websites[2022]Vinho/2022-11-28
-
10 Best HDHub4u Alternative Sites for Movie DownloadAugust/2024-03-06
-
Best Free Online Movie Streaming Sites without Sign Up & How to DownloadVinho/2022-11-02
-
How to Download Videos from Pluto TVAugust/2024-03-06
-
Best & New Movies on Hotstar – Hindi/Telugu/Tamil MoviesVinho/2023-01-11
-
How to Download Private YouTube Videos Without AccessAugust/2024-03-04
-
How to Download & Add YIFY Subtitles for YIFY MoviesAugust/2024-03-06
-
5 Free Movie Downloaders – Download Movies to Watch Offline FreeValyn/2024-03-06
-
10 Best Stream2Watch Alternatives for Live Sports OnlineAugust/2023-07-25
-
5 Best ZEE5 Video Downloaders to Download ZEE5 VideoAugust/2023-03-29